Product Manual
The Basics
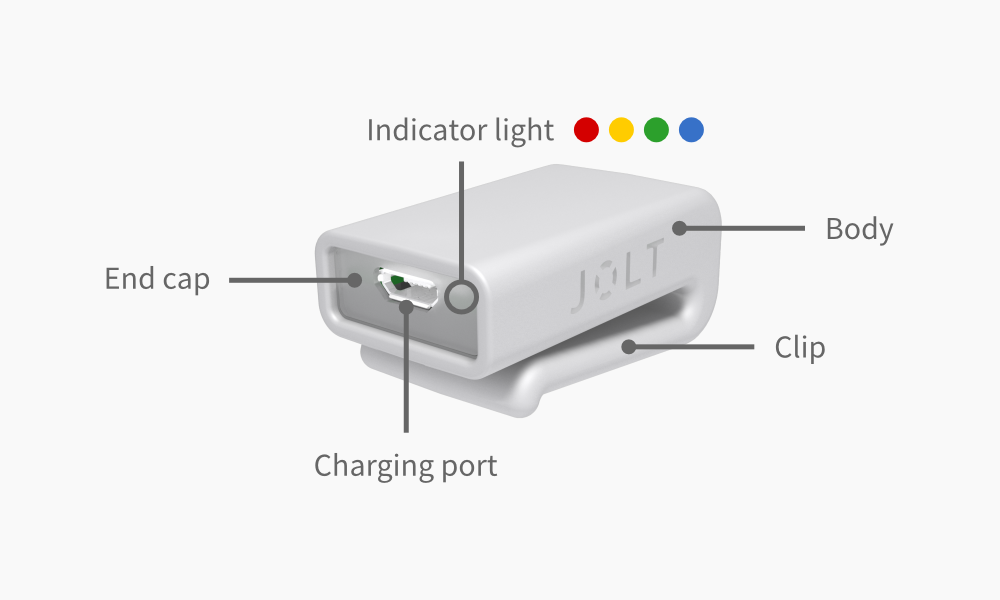
The included micro USB to USB charging cord can be plugged into the micro USB charging port to charge the Jolt Sensor. When plugged into a power source, the indicator light will blink red to indicate that the device is charging. When the indicator light stops blinking, charging is complete. Additional indicator lights can be enabled through the Jolt Sensor app. When enabled, the indicator light will turn green to indicate that the unit has detected movement and is in active sensing mode. Blue and yellow lights will indicate smaller impacts, while a red light indicates a significant impact. When vibration is also enabled, the unit will also vibrate when it detects a significant impact.
Getting Started
Plug in sensor
Remove the Jolt Sensor from its packaging, and use the included micro USB charging cable to connect the sensor to a power source, either through an FCC compliant AC USB power adapter or by plugging directly into a computer USB port. This will turn on the sensor for the first time, and the indicator light on the sensor will flash red to indicate that the unit is charging. Leave the sensor plugged in through the remainder of the setup process.
Download the app
Download the "Jolt Sensor" app from the App Store (iOS) or Google Play Store (Android).
Create user account
Open the Jolt Sensor app and follow instructions for creating a user account and logging in. Once you are successfully logged in, click through the brief tutorial that appears to get you acquainted with the app's interfaces and functionality.
Configure the sensor
From the main "Dashboard" screen, click the "Add" button in the upper right and select "Create New Player" from the dropdown. Fill out the player profile biographical information and sports profiles. Then tap the "Add New Sensor" button to initiate configuration. When the process completes, select the "Create" button in the upper right to complete the configuration process.
Finish charging
Leave the unit plugged in until the red light stops blinking. This indicates that the device is fully charged. The device is now fully configured, fully charged, and ready to measure accelerations. The sensor is always on and logs all impact data onboard. To receive live data through the app, you must have Bluetooth enabled on your phone, with the Jolt Sensor app running in the background.
Mounting
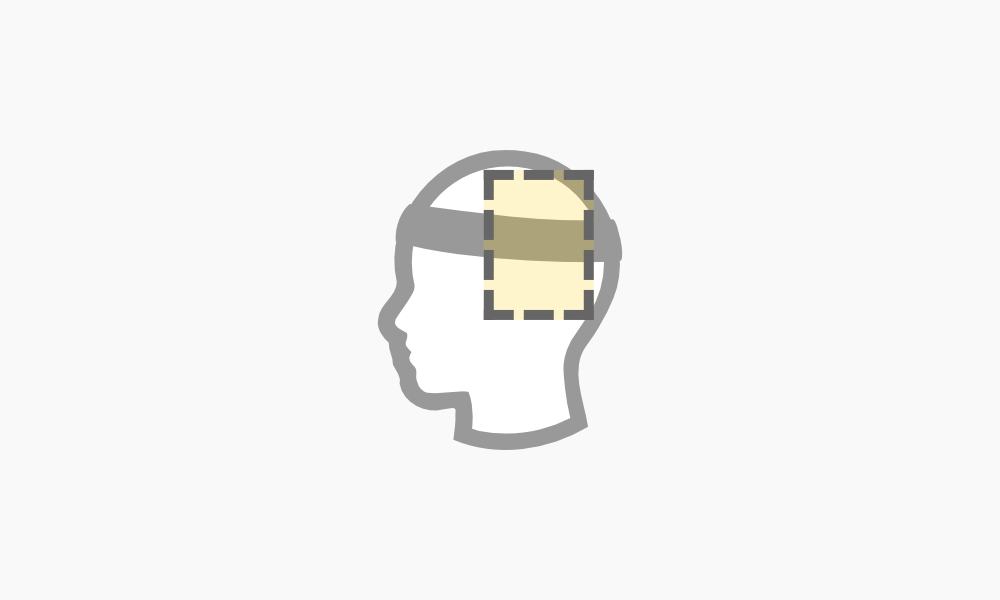
The sensor can be mounted to any piece of head-worn athletic equipment by clipping it on to a free edge. Ideal mounting position is around the line that a headband would be worn around the head, at or behind the ear, but not directly at the back of the head. Suggested mounting placement is shown in the diagram below.
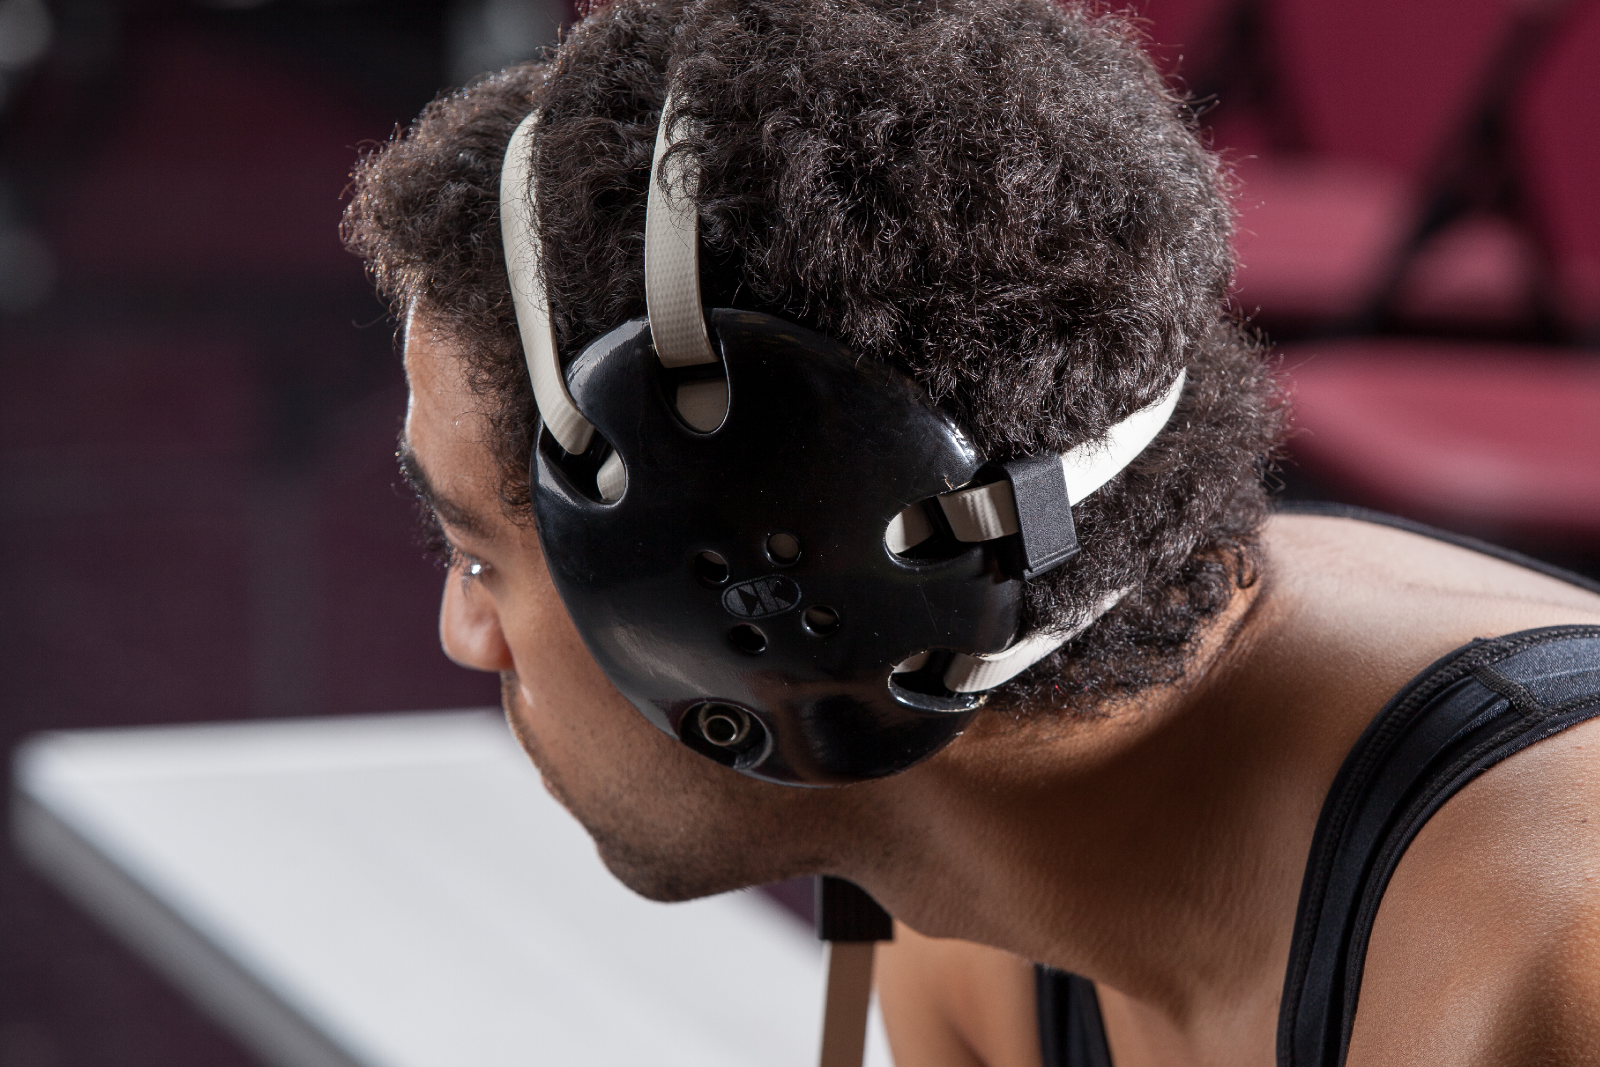
For sports like soccer and basketball, where the only headgear is sweatbands and hairbands, the image below shows how the Jolt Sensor can be clipped on. Note the placement of the unit just above and behind the ear. Similar placement can be applied when worn on wrestling headgear (also pictured), womens lacrosse goggles, and other athletic equipment with a band worn around the head.

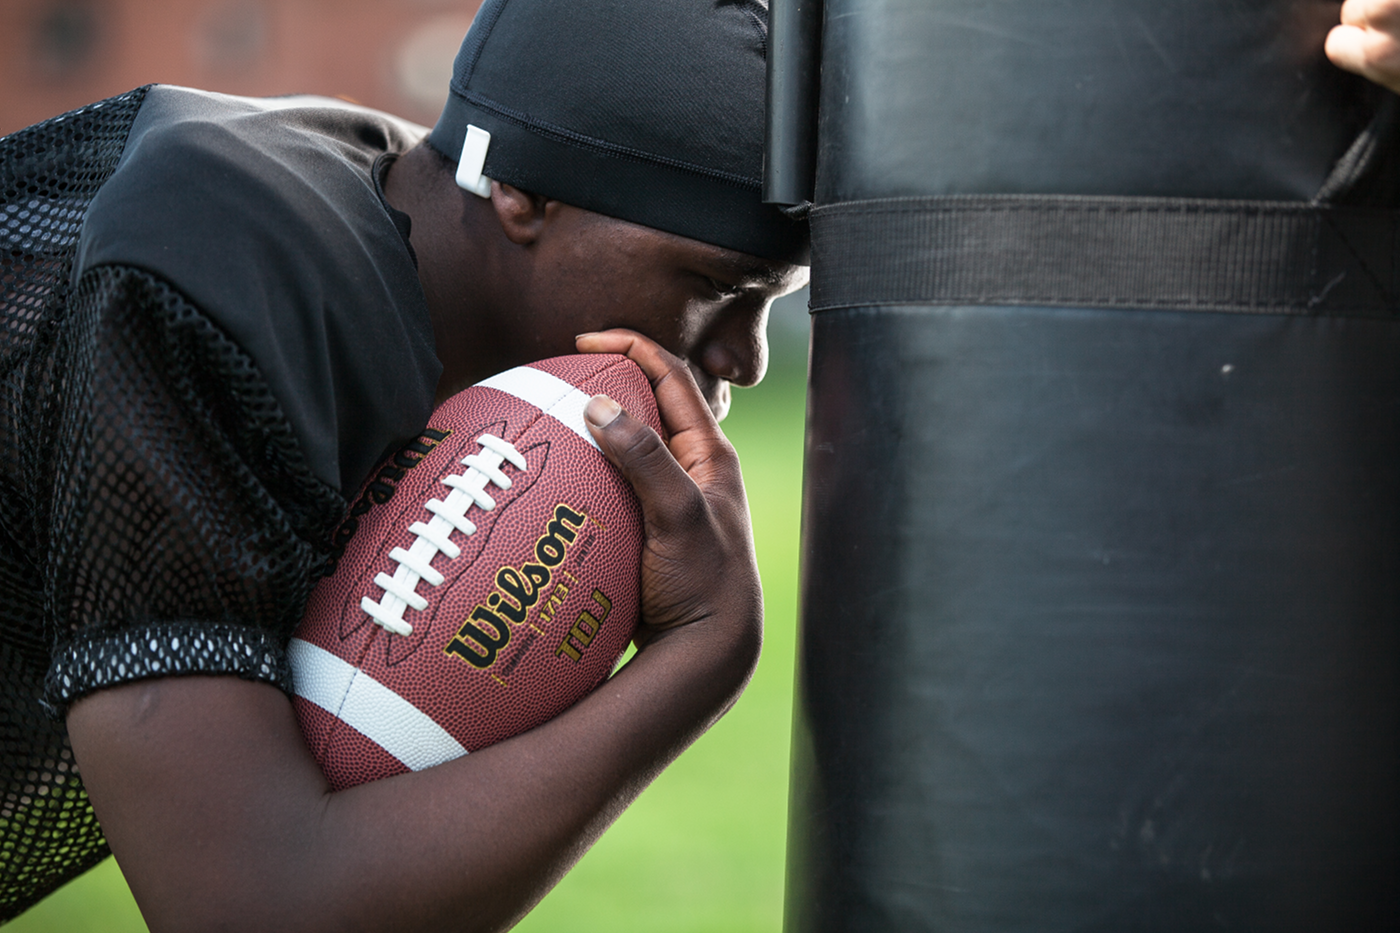
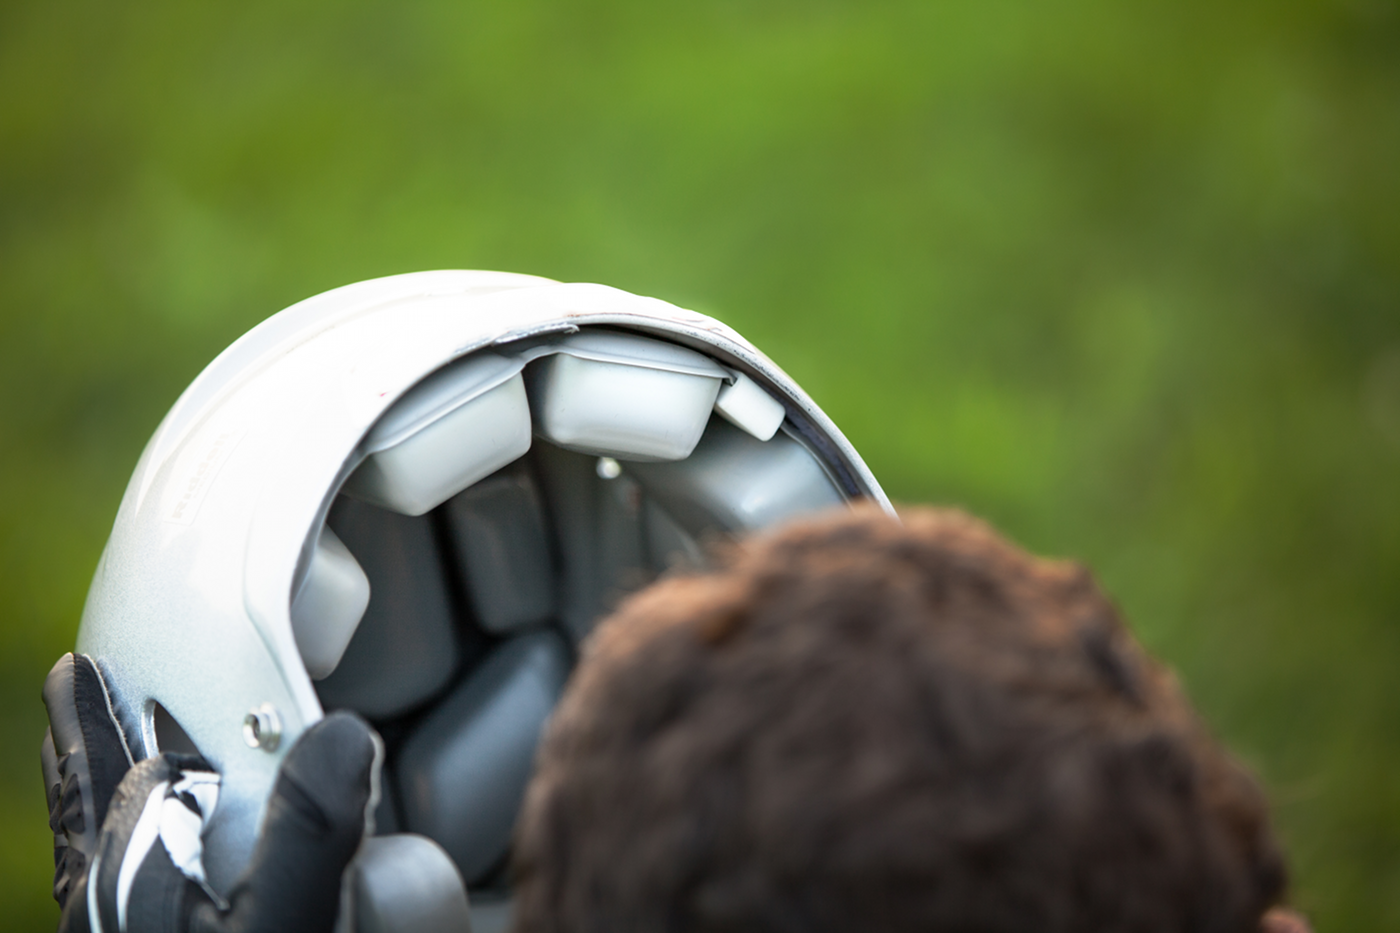
When using the Jolt Sensor with a helmet, like a football helmet, that has sufficient space to fit the sensor inside of it, there are two different ways it can be worn. First, it can be worn on a headband or skullcap (pictured) underneath of the helmet, following the same placement guidelines as described above. When wearing the Jolt Sensor in this manner, be sure to adjust alignment so that it sits in a gap between pads in the helmet.
The second way to wear a Jolt Sensor with a helmet is to mount it directly to the helmet. The padding in football helmets consists of discrete pods, connected by sheets of plastic. The edges of these sheets, between the pods, are an ideal place to clip the unit (shown below). In most helmets, the best available edges to clip the sensor are around the ear hole and towards the back. The general placement guidelines described for headbands apply here.
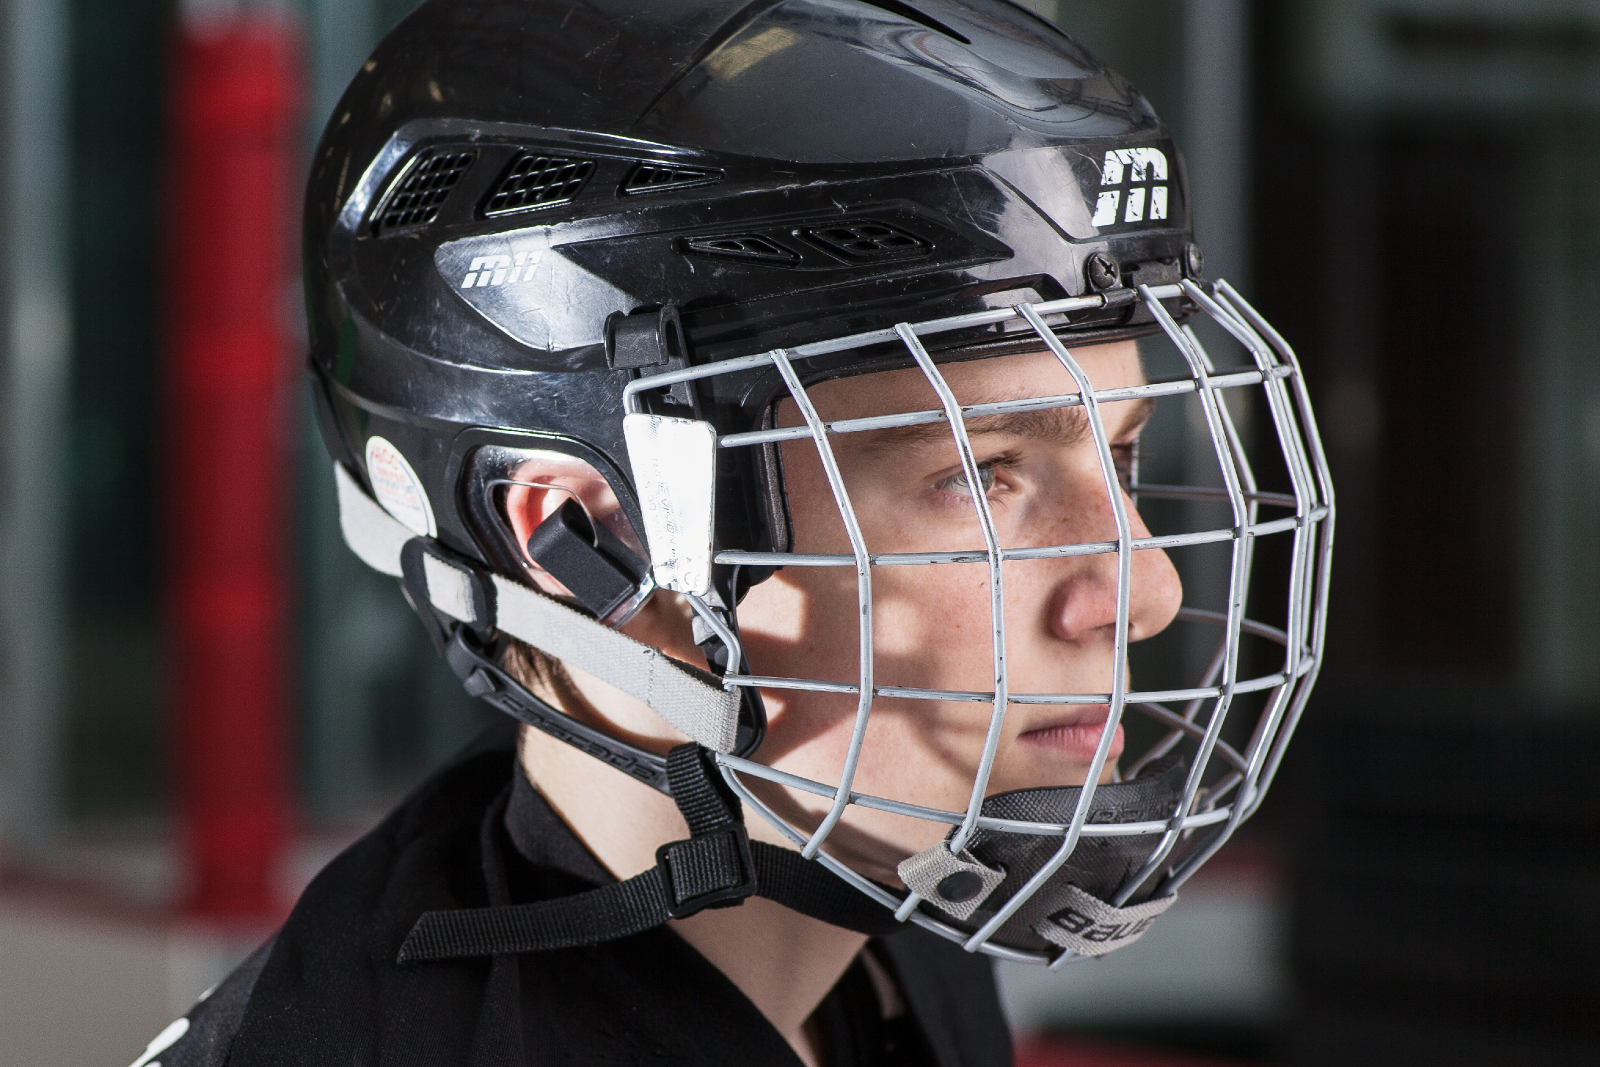
Some helmets, like hockey helmets and bicycle helmets, don't have sufficient interior space to wear a sensor inside of them, whether directly attached or on a skullcap. In this case, most ideal mounting positions are near the ears, either on a strap that runs behind the ear on clipped to the ear shield (as shown on a hockey helmet below).
For headgear not explicitly described here, follow the placement guidelines and mounting suggestions for other headgear to come up with the best possible solution. We know that there's great variety to headgear out there and that mounting may take some creativity. If you're having trouble coming up with a good solution, simply snap a picture of the equipment you're working with and send an email to mounting@joltsensor.com for guidance. We're here to help.
Sensor Modes
Jolt Sensor is equipped with an indicator light and vibrating motor that can be enabled to provide additional feedback directly to the user. These features can be enabled through the Jolt Sensor app. From the "Dashboard" screen in the app, select "Menu" and then select "Data Sync". This will display a list of sensors that are connected with your profile. Make sure that the sensor you're trying to configure is plugged in to a power source so that its "Visible" status in the list is "Yes". Select that sensor on the list to access its configuration page, where you can toggle switches to turn both light indicators and vibration on and off.
Note that enabling the light indicators can have a negative impact on sensor battery life, reducing expected battery life to less than a month. It is suggested that this mode is used when you first unbox your unit and are getting acquainted with it, but then disabled for typical use to preserve battery life.
When enabled, vibrations will only be triggered in the event of a significant impact. The app recommends evaluating a player on the sideline following such an impact. Enable vibration if you would like the athlete to be alerted that they have experienced a significant impact and should go to the sideline for evaluation. Disable vibration if you would like the coach, parent, or trainer to be responsible for directing the player to be removed from play for evaluation.
Syncing & Updates
Although the sensor communicates important impact data to the app in real time, there are many more small impacts that it simply stores onboard to preserve battery life. To ensure player insights and trends benefit from the full body of data, it's important to periodically sync this additional data to the app. To access the syncing interface from the "Dashboard" in the Jolt Sensor app, select Menu > Data Sync. Make sure the sensor you would like to sync is plugged in to a power source, so that it displays as visible on the Data Sync menu. Select it and press --button name-- to sync the data. Do not unplug the sensor until the status bar indicates that the sync is complete.
You can also update the Jolt Sensor's software from this menu. When we release a new software update, an indicator will display in the Jolt Sensor app on the Menu button on the Dashboard to guide you to this page. Press --button name-- to start the update. Do not unplug the sensor until the status bar indicates that the update has successfully completed.
Managing Sharing
If you would like to let another user see live data from one of your sensors, you can share view permissions with them through the app. From the Dashboard page in the app, select Menu > Manage Players, and select the name of the player that you would like to share. From the share page you can copy the share code to text or email to the person you would like to share it with. To add a player using a share code, select "Add" from the Dashboard, select "Add From Share Code", and input the share code, along with the name of the player you are adding.
You can manage sharing from the same page where you generate share code. To revoke access, select one or more people on the list and then press "Delete" in the upper right.
Wear & Care
Cleaning
When you remove Jolt Sensor from its mounting location for periodic charging, you can also give it a quick clean to remove dirt, sweat, and anything else that has built up on it. You can rinse it with water or wipe it with a small amount of rubbing alcohol. When doing so, avoid getting liquid or debris in the charging port. Do not use soap or household cleaners that may irriate the skin. Always dry well before remounting the sensor.
Moisture Management
The end cap of the Jolt Sensor is bonded to the body with an acrylic solvent to help seal out dirt and moisture. And the interior electronics have an additional rubberized coating to repel liquid. This construction makes the unit very water resistant, however it is not waterproof. It should not be submerged, and you should avoid prolonged exposure to moisture. If it does become waterlogged, place it in a container with dry uncooked rice, positioned with the end cap facing downward so that moisture can drain through the charging port. Allow the device to drain thoroughly before using it again. Do not attempt to dry it with an external heat source, such as a hair dryer or microwave over.
Battery & Charging
Avoid exposing your Jolt Sensor to extreme temperatures or humidity. Extremely high or low temperatures may temporarilly shorten the battery life and impair the device's ability to function properly. Even if you're not using the Jolt Sensor regularly, be sure to periodically charge it to help maintain battery performance.